ChatGPT on the web: step by step

This connects Atlas to ChatGPT in your browser and adds the Atlas skills. There are three parts: get to the plugin directory (steps 1 to 4), add the connector (steps 5 to 9), then add the skills (steps 10 to 14). On the web the connector and the skills are set up separately.

You need ChatGPT Business, Enterprise or Edu, and permission to add custom MCP servers: on Business that means a workspace admin or owner. Using the desktop app instead? See ChatGPT desktop app: step by step.

Part 1: Open the plugin directory​

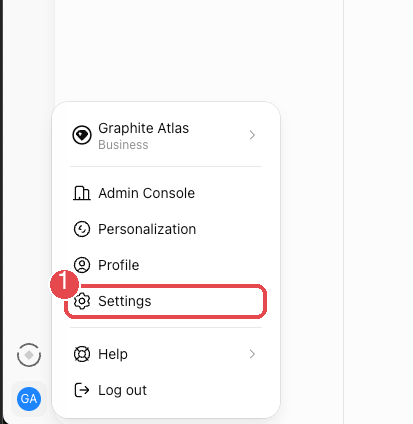
The account menu with Settings marked
1. Open Settings. In ChatGPT on the web, click your initials at the bottom left, then Settings (1). The menu shows your workspace and plan: you must be an admin or owner of it.
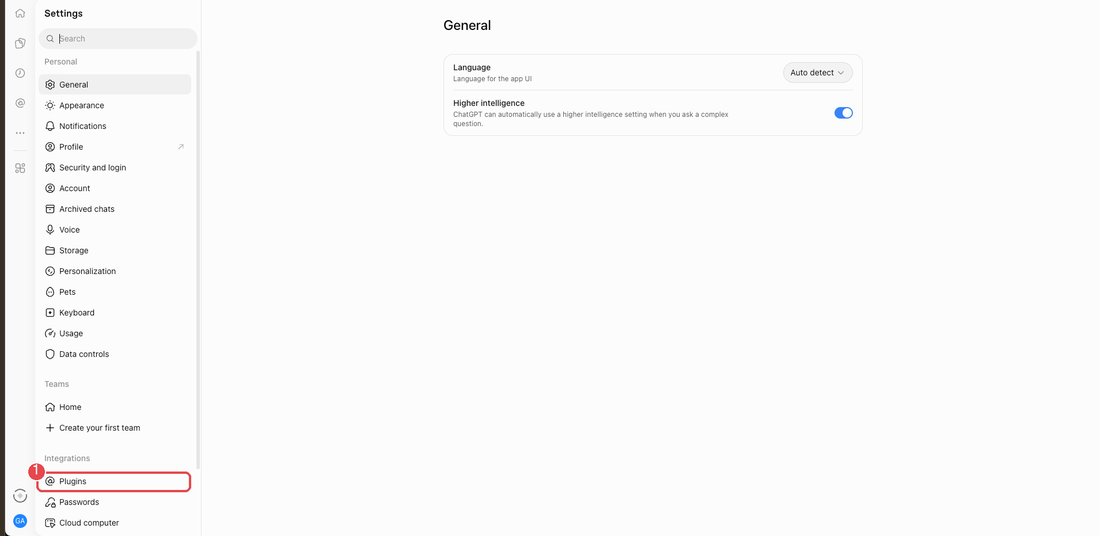
Settings, with Plugins under Integrations marked
2. Open Plugins settings. In the Settings list, scroll to Integrations and select Plugins (1).
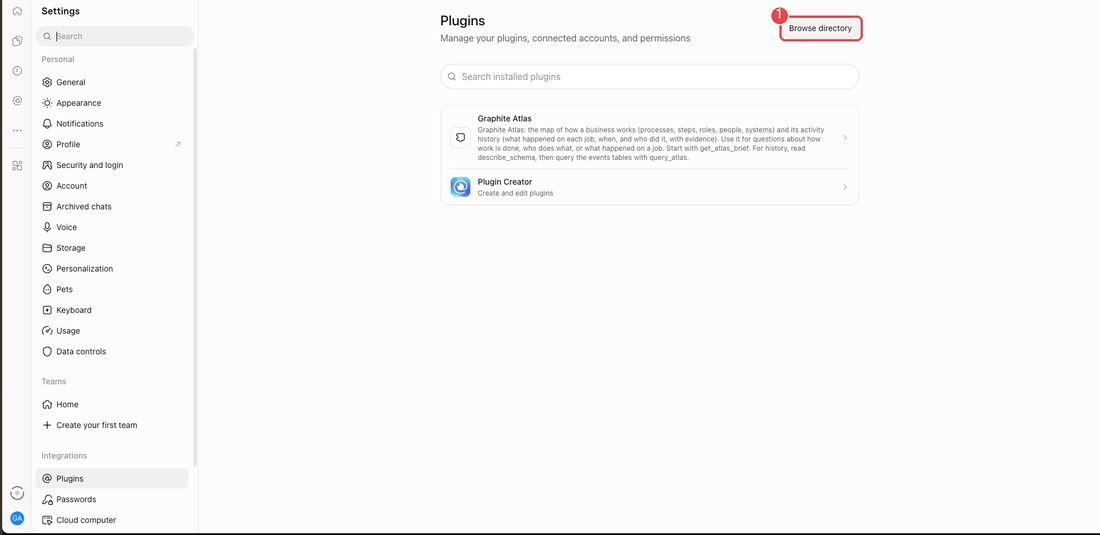
The Plugins settings page with Browse directory marked
3. Open the directory. Select Browse directory (1).
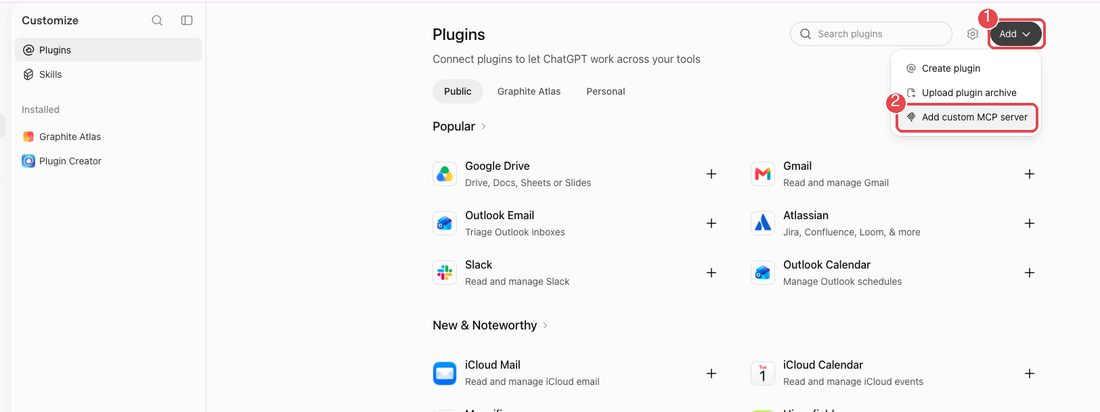
The Add menu with Add custom MCP server marked
4. Open the Add menu. Select Add (1), then Add custom MCP server (2). If that option is missing, see If it is blocked.

Part 2: Add the Atlas connector​

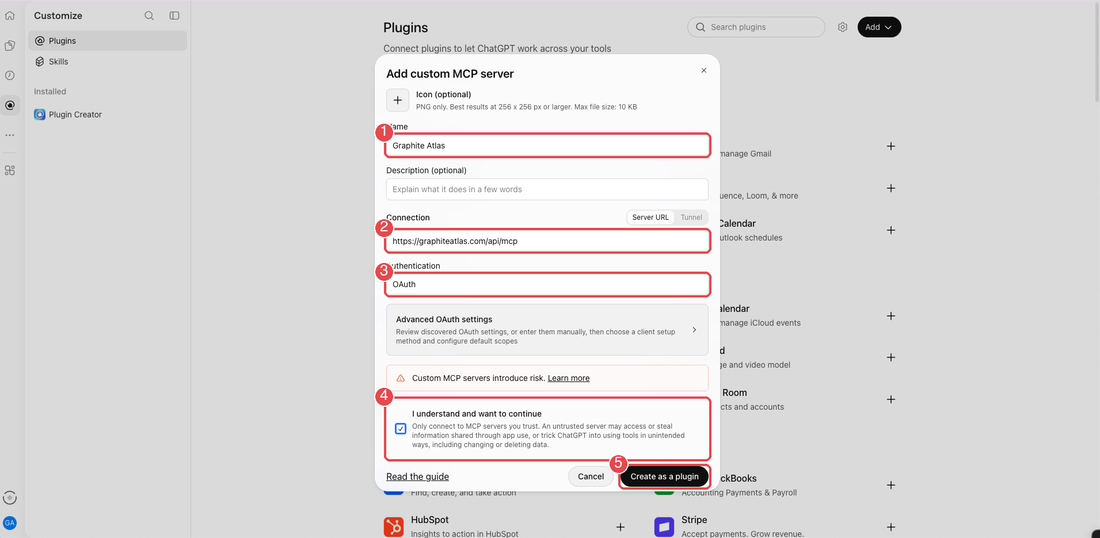
The Add custom MCP server form, filled in
5. Fill in the form. Set Name to Graphite Atlas (1). Under Connection, keep Server URL and enter https://graphiteatlas.com/api/mcp (2). Leave Authentication on OAuth (3). Tick I understand and want to continue (4), then select Create as a plugin (5).
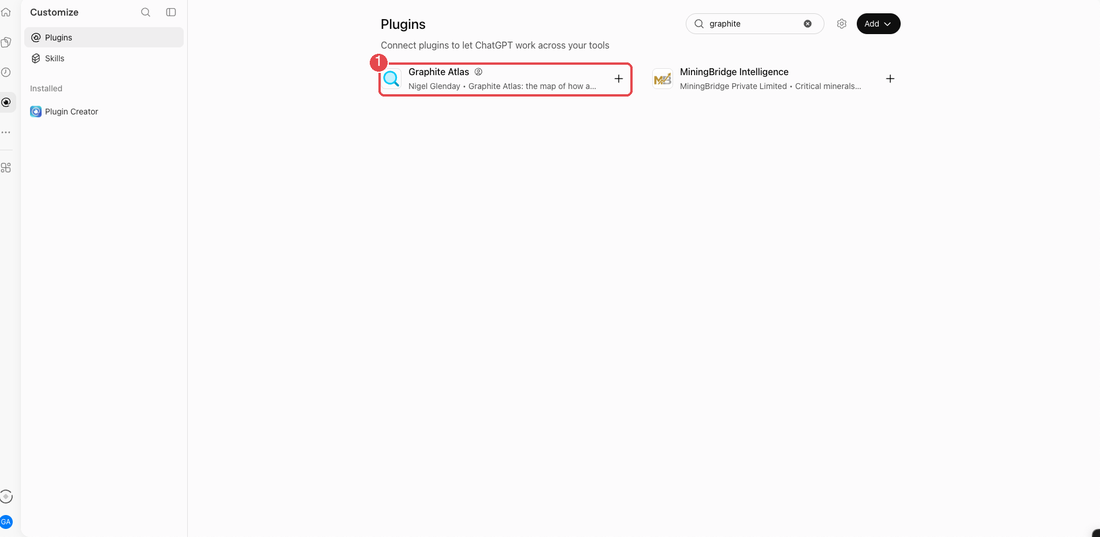
Plugin search results showing Graphite Atlas
6. Open your new plugin. In the plugin directory, search for graphite and open Graphite Atlas (1).
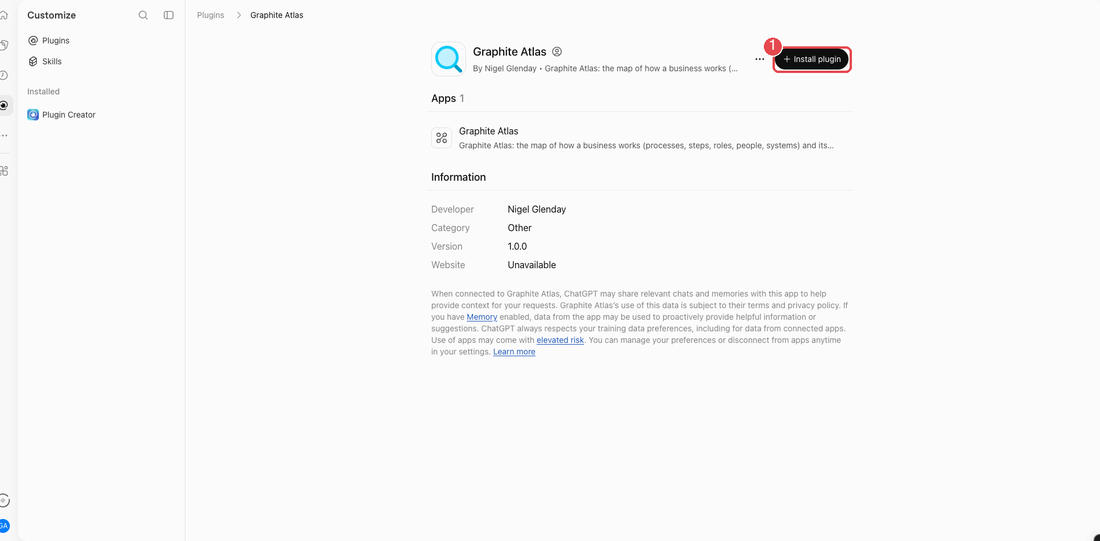
The Graphite Atlas plugin page with an Install plugin button
7. Install it. Select Install plugin (1). The page lists one app, the Atlas connector.
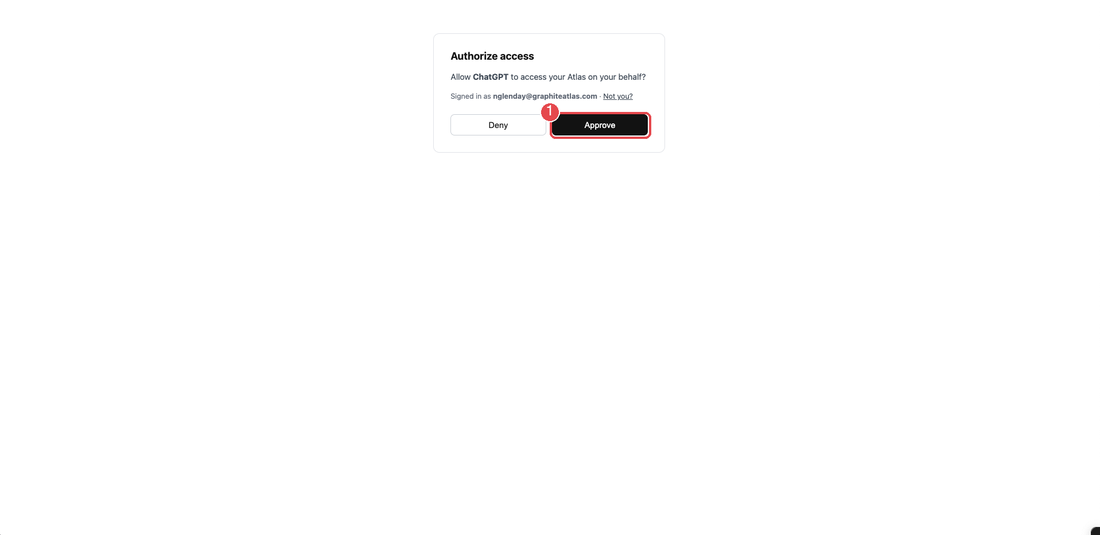
The Atlas Authorize access page
8. Sign in to Atlas. ChatGPT opens Atlas in your browser. Check the Atlas account named on the page, or select Not you? to switch. Select Approve (1).
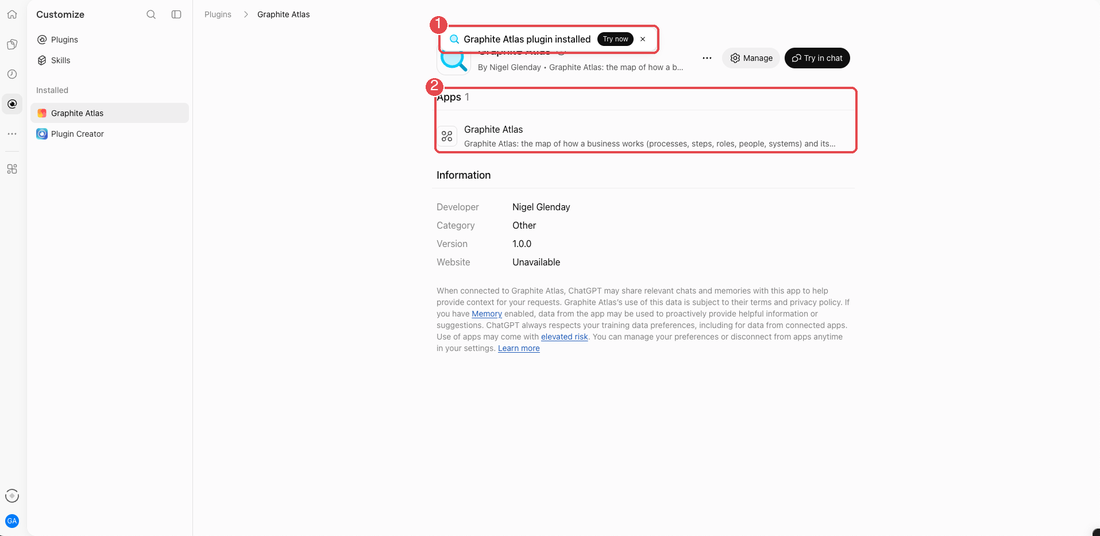
The plugin installed message and its Apps section
9. Confirm it installed. A "Graphite Atlas plugin installed" message appears (1). The plugin holds Apps 1 (2): the connector only. The skills come next, and they are not in Plugins.

Part 3: Add the Atlas skills​

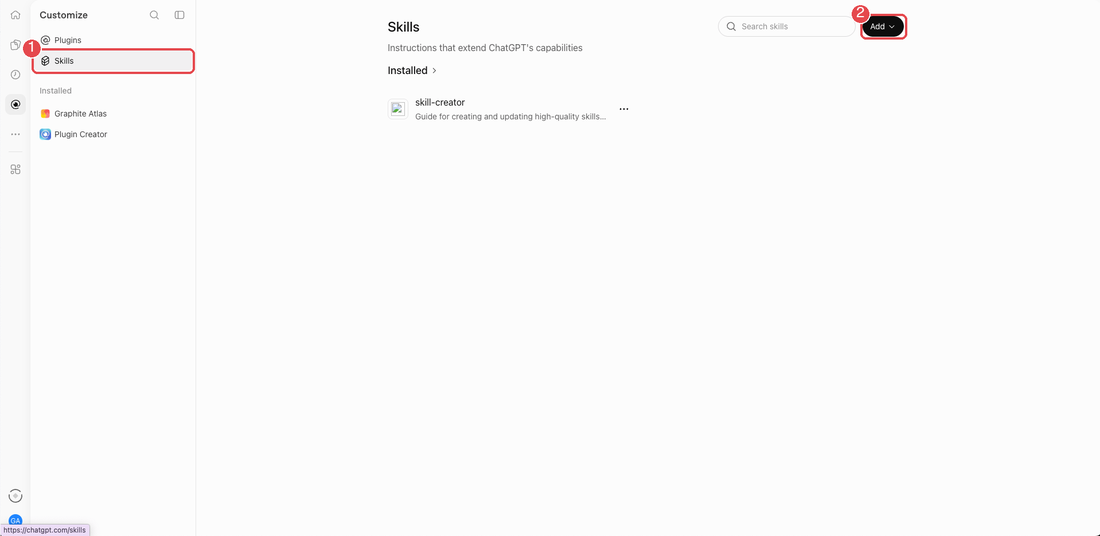
Customize, Skills, with the Add button
10. Open Skills. In the Customize sidebar, open Skills (1). This is a separate list from Plugins. Select Add (2).
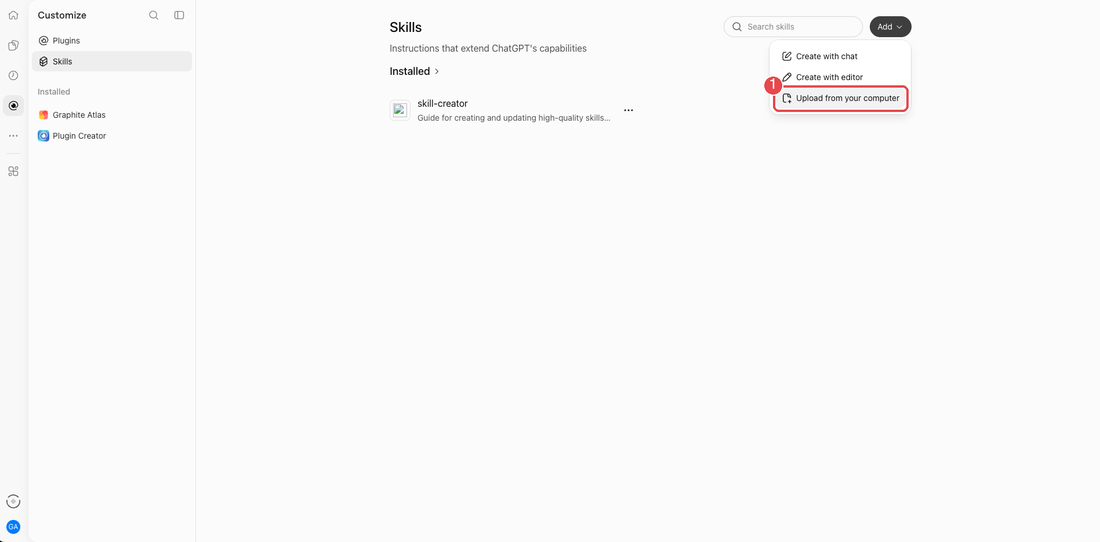
The Add menu with Upload from your computer
11. Choose Upload. Select Upload from your computer (1).
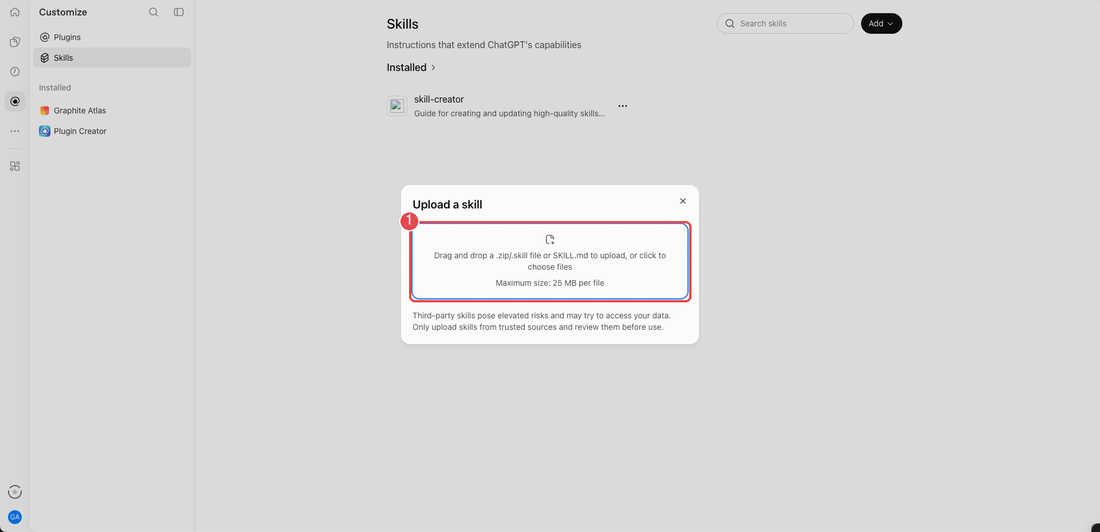
The Upload a skill dialog
12. Add the skills file. Download the file, then drop it on the box (1), or click the box and choose it.

Download atlas-skills.zip

One file holds all five skills. Current version: 0.3.3 (2026-11-13). When the version changes, upload the new file again and delete the older copies.
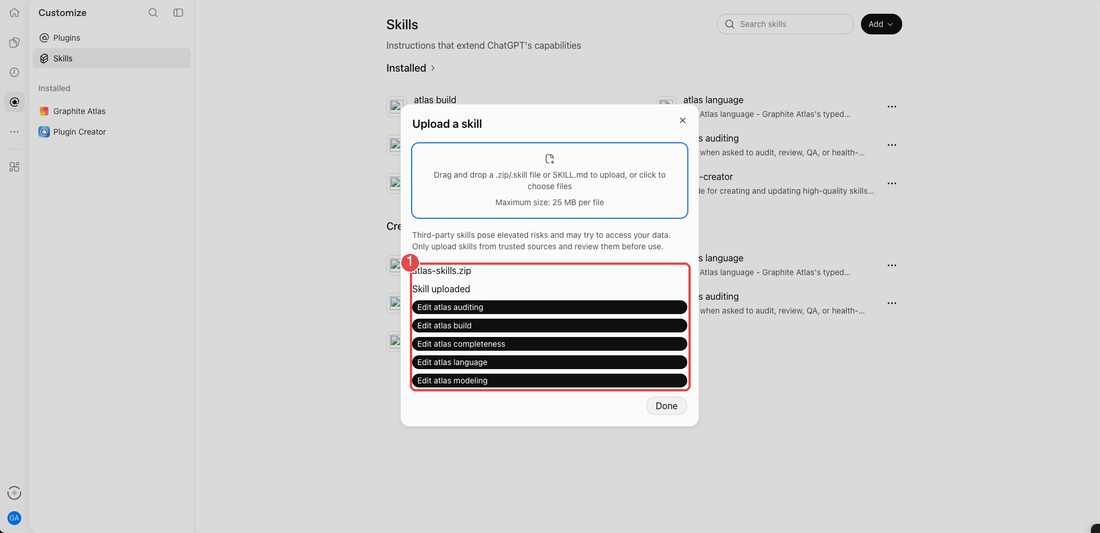
The five uploaded skills listed
13. Check the upload. ChatGPT unpacks the file and lists all five skills (1): Atlas Auditing, Atlas Build, Atlas Completeness, Atlas Language and Atlas Modeling. Select Done.
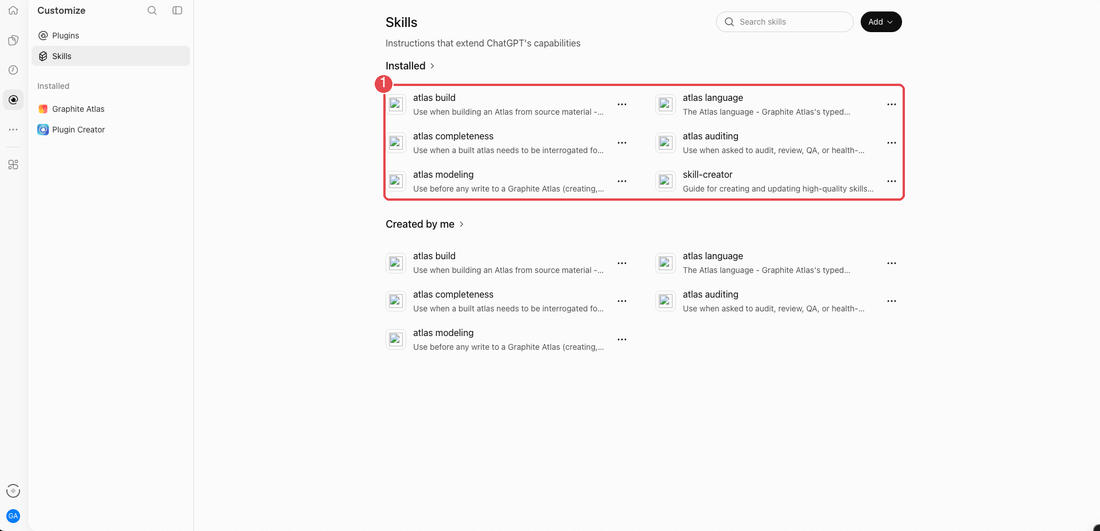
The Skills page listing the five Atlas skills as installed
14. Done. The five skills show under Installed (1) and Created by me. They load on their own when ChatGPT needs them.

Part 4: Let your teammates use it (admin)​

What you create in Parts 2 and 3 is private to you until you publish it.

  • The connector. In Plugins, open the Personal tab, find Graphite Atlas, open its three-dot menu, select Publish, and choose which workspace roles get it. Only a workspace admin can publish. Teammates then find it under the tab named after your workspace, install it, and sign in to Atlas with their own account.
  • The skills. In Skills, open the three-dot menu on each Atlas skill, select Share, and choose who gets it. Each teammate then installs them from Skills.

Try it​

Start a new chat, type @ and pick Graphite Atlas, then ask: "List my atlases." ChatGPT should call the list_atlases tool and show your atlases. Ask it to build or audit something and it will use the skills.

If Atlas asks you to sign in again later, repeat step 8.